Back to School Specials. Shop Now

Paper Magiclay 240g White 6 Canisters

$2833 AUD (inc GST)
$2575 AUD (ex GST)
Tax included, shipping and discounts calculated at checkout.

Earn 28 Points when you buy this item.


Soft, Air-Drying Clay in Handy Classroom Canisters

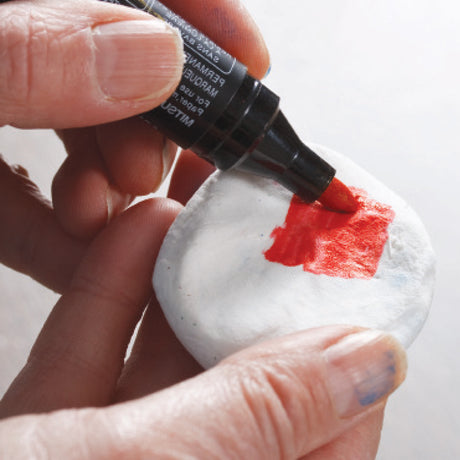
Paper Magiclay White is a lightweight, soft, and elastic modelling compound that air-dries within hours, creating a paper-like texture when dry. This easy-to-use, mess-free clay requires no adhesives or tools, as it bonds wet to dry, allowing for seamless sculpting and layering. Once dry, it can be coloured, painted, or decorated, making it a versatile material for creative projects. Now available in a 240g pack containing six 40g canisters, this set is perfect for easy distribution in the classroom, ensuring every student has the right amount for their artistic exploration. 

NB: As an airdrying modelling clay, Magiclay has a shelf life of 12 months.

Magiclay  |  SKU: ML285

Key Features

• 240g pack with six 40g canisters
• Colour: White
• Lightweight, soft, and elastic for easy modelling
• Can be pulled, stretched, rolled, and embossed into any shape
• Bonds wet to dry – no adhesives or tools required
• Can be coloured, painted, and decorated once dry
• Handy canister packaging for easy classroom distribution
• Air-dries in hours – no kiln or oven needed
• Shelf life of 12 months
• Suitable for all age groups

In the art room, Paper Magiclay is ideal for sculpting, model-making, and mixed-media projects. Its soft, stretchable texture makes it easy to pull, roll, emboss, and shape, allowing students to create detailed figurines, textured reliefs, and lightweight 3D structures. Teachers can incorporate it into STEAM activities, fine motor skill development, and creative storytelling projects. With its quick air-drying properties and adaptability, this clay is an essential resource for all ages and skill levels.

Additional Information

Important features of Paper Magiclay White:
Magiclay adheres wet to wet, and wet to dry – no adhesives are required. Magiclay can also stick onto paper and canvas to create 3D and textured elements to artwork.
It can be pulled, stretched, sprung back, rolled, coloured with paint, Food Dye or markers.
Magiclay comes in a range of colours and mixes using the same colour mixing rules as paint.
Best used over an armature so that only a very thin layer of the material is required.
A great material to use after exploring real clay or Clay Dough, to develop skills and create final artwork.
Magiclay only has half an hour workability before it will start to harden.
Work on a clean surface and avoid overworking before attaching material to a model.
Use small amounts of Magiclay at a time and store unused material in a sealed container to prevent premature drying.
Free from wheat, gluten and wheat derived products
Colouring Magiclay (Wet clay): Easily colour white Magiclay with paint, dye and markers. Just add a small amount of pigment and mix through prior to modelling.

Colouring (Dry) Once Magiclay is dry, its surface can be painted or printed on.

Blending and Marbling Colours Mix colours together to expand your colour palette. Add white to lighten and brighten colours. For marbled effects, lightly mix colours.

Model Making: Paper Magiclay will bond wet to dry – just press on a surface, or press parts together and it will hold; no adhesives, joining techniques or special tools are required. It can be pulled, stretched, sprung back, rolled, and can be used in combination with other materials. This is why it is ideal clay for model making and popular with all age levels.

Building Up Surface Press Magiclay directly onto canvas or paper to build up a surface on which to paint.

Creating Forms Create an armature as a base and mould Magiclay over the top. Magiclay can be smoothed out and finer details can be added.

Use as a canvas: Emboss and imprint designs and patterns into the surface. When dry, Magiclay can be stitched into.

Shaping and Finishing a Form Magiclay can be applied to an object to create a unique form. Once sealed, alternate between sanding and painting to build up a polished and smooth surface. Varnish to finish.

Modelling Techniques and Skills Using Paper Magiclay White
Take a golf ball size piece of Magiclay.
Hands as Tools: with different parts of the hands, try squeezing, twisting, rolling, pinching, tearing/pulling, pressing to make different shapes; try joining and smoothing a surface. Use these techniques and skills to make different parts of one or two of the subjects in Step 1.
Using Tool Set: create different lines, textures and patterns. Explore how these could be used on different parts of a particular subject e.g. the indentations created with the blade looking part of the tool could look like the veins on a butterfly wing, or the “cup” marks could add texture to clothes.
Using Other Tools: try cutting, trimming and fringing with a pair of scissors. Find items that could be used as tools eg a fork could create repetitive indentations

Specifications (ML285)

  • Catalogue Page Number
    233

Safety Data Sheet